Set up a user
Before you start
|
Why do I need to set up all this stuff?
|
|
Overview of process |
|
Step 1. Create your user
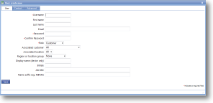
- In the Setup/Maintenance menu, select User and click 'Add user'.
- Username, Password (and confirm) and Role are the only essential items, but other items, such as e-mail address and phone number, might be useful for outputing on reports or sending automated e-mails.
- Save.
Step 2. Assign your user to a group
- Click on your user.
- Click on Add Group.
- Select a group from the dropdown list. A group called 'Standard' will be set up when you register with magic5 - click here if you wish to find out more about creating further groups.
Please note that this group is not the same as the 'Region or location group' shown above. This group can be perceived as a conceptual group (such as administrators, auditors, supervisors, or maybe Company A, Company B, Company C) as opposed to a geographical group of, maybe, southwest, northeast, London, etc. Although either can be whatever is required, bear in mind that users (and customers) can be organised into two types of criteria.
Step 3. Edit user details
- From the same screen as in Step 2, click the user name.
- For a full description of the user screens please see Users help page.
See Also


