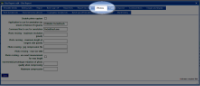
Click on the seventh tab to modify Photo parameters |
The Photos tab enables you to adapt the way the template handles photographs included in the form. With the high resolution cameras available on many phones the data size of photos can be considerable. This can be an issue in terms of storage and page loading speed on the device and PDF documents on the server, but more particularly with data transfer times and cost when transferring forms between device and server. Camera settings on the device can be adjusted but users are not always able to change between the settings required for different forms. The options below allow the ‘raw’ photo taken on the device to be resized, either by actual width and height, resolution or compression. |
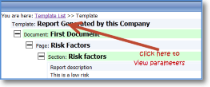
Click on template name to view parameters. |
| Disable photo capture | By default, photo capture is enabled on all items within a template. Check this box if you would like photo capture to be disabled. |

Enter rules for handling photographs. |
| Application to use for annotation (as shown in Remove Programs) | For Device forms, this option allows a third party program to be specified as an editor for any captured photos. For example, GVMobile PocketBrush. | |
| Command line to use for annotation | This item enables a programming “command line” to be specified in order for magic5 to launch a third party photo annotation program - for example, PocketBrush.exe. Please refer to your magic5 expert for correct parameters of the annotation product you plan to use. | |
| Photo resizing - maximum resolution (pixels) |
The number entered here will adjust the resolution, or number of pixels, used in a photo. In other words, if 1 million pixels would be the best size to use then enter 1000000 (without commas or spaces) here and the photo size will be adjusted to have 1,000,000 pixels whilst keeping the same photo aspect ratio (ie ratio between width and height). |
|
| Photo resizing - maximum length of longest side (pixels) |
In addition to specifying the maximum resolution it is possible to specify the maximum length. This will be applied to the longest out of width and height and then the other dimension will be shrunk down whilst keeping the aspect ratio. For instance if you wanted photos to appear on the report no more than 620 pixels wide then enter 620 here. |
|
| Photo resizing - jpg compression (%) |
You may also specify the level of jpg compression as a percentage. If you chose 100% then no compression is used. Specifying a level of less than 100 will reduce the size of the photo whilst losing some of its quality. In many cases, high levels of compression can be used without adversely affecting the end result. |
|
| Photo resizing - max size (KB) |
Enter a number to represent the size of the resulting data file. This is the best option to use for controlling the file size, rather than photo size. |
|
| Photo resizing - use exact measurement for max length |
Tick this box to force maximum length to be used as a priority |
|
| Incremental percentage reduction of photo quality when compressing |
If compression is undertaken by small increments, the resulting quality is better than if large increments are used but the process takes much longer. For example, if 1 is entered here and compression is to be 10%, the process will be less severe but repeated 10 times. If 10 is entered here, the process will be undertaken once but the quality will be poorer. With this in mind enter a number that optimises these factors for your needs. |
|
| Maximum compression |
Enter a number to represent the percentage compression that should be applied to achieve the resizing above. 100 equates to no compression but means the file is still large, and, at the other end of the scale, 10 or less is really poor quality but allows very small files. With this in mind enter a number that optimises these factors for your needs. |