|
Bubble-style lists can be set up to appear on the device to make choosing the correct form easier |
||
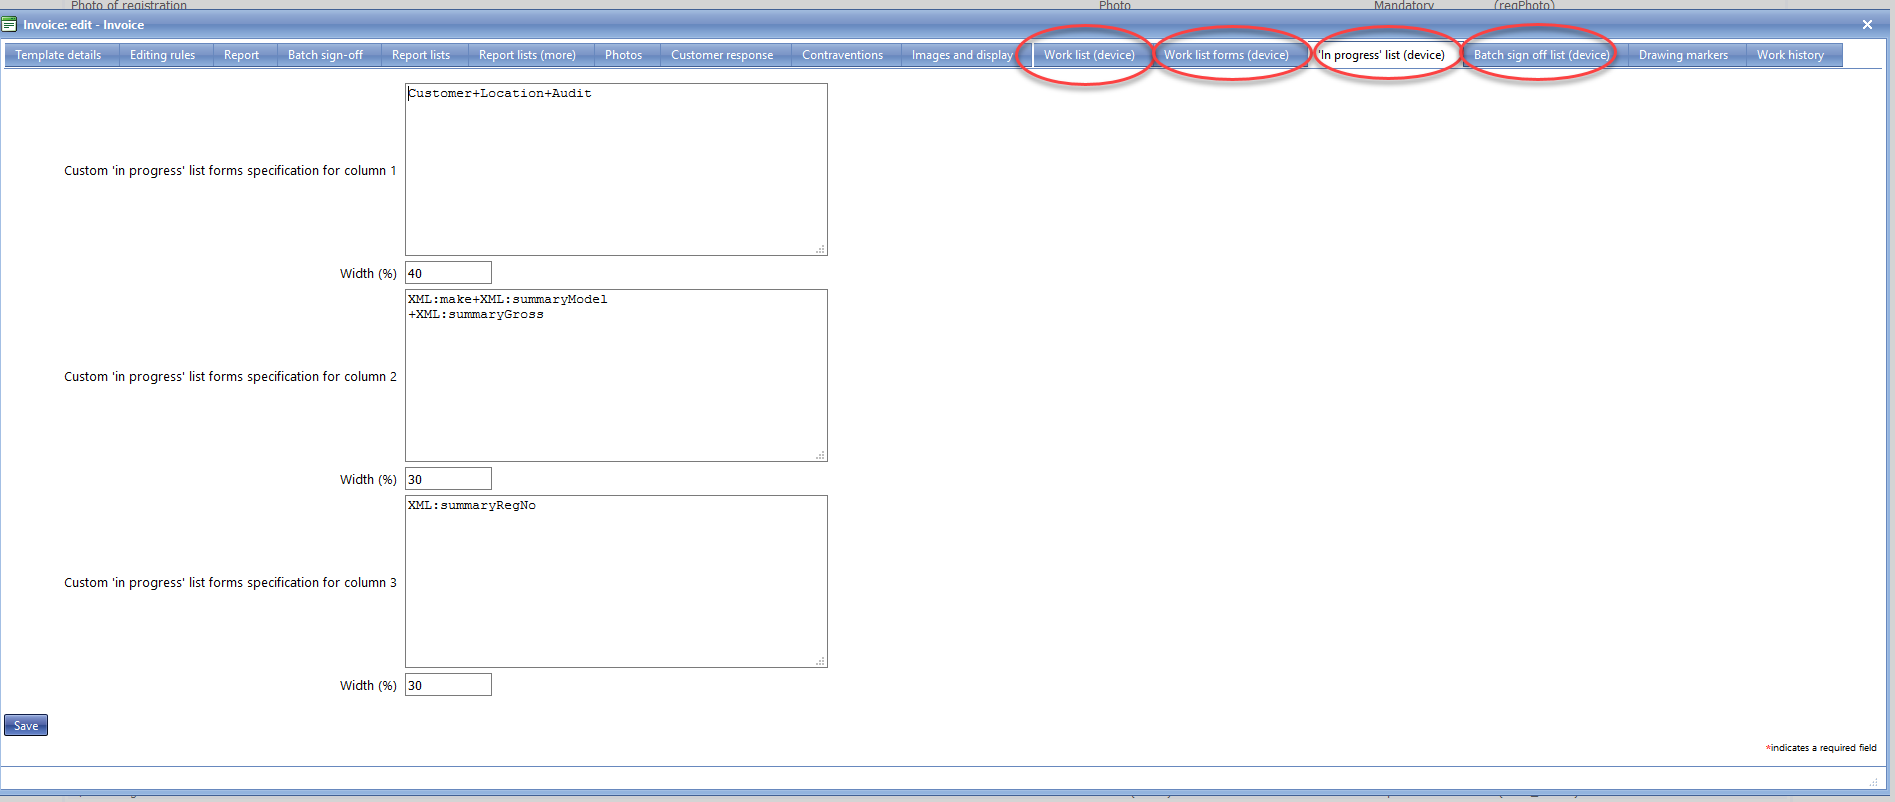
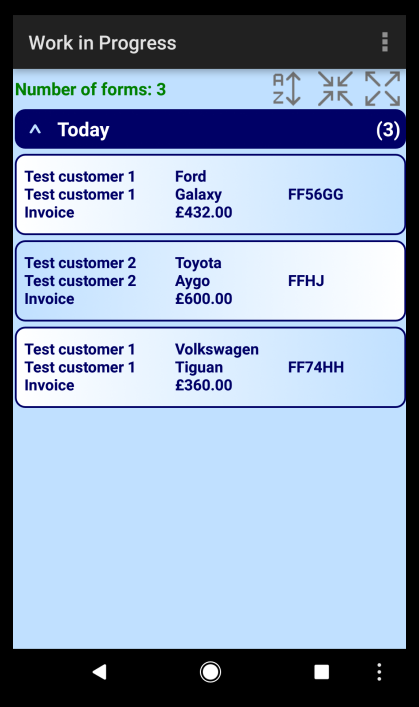
| 'In progress' list (device) | shows forms that have been started on the device and saved but not released back to the server, either because they are incomplete or because they have a manual release that has not been activated | |
| Work list (device) | shows work that has been allocated to you (or your group) | |
| Work list forms (device) | shows all the forms relating to a job selected from the Work list | |
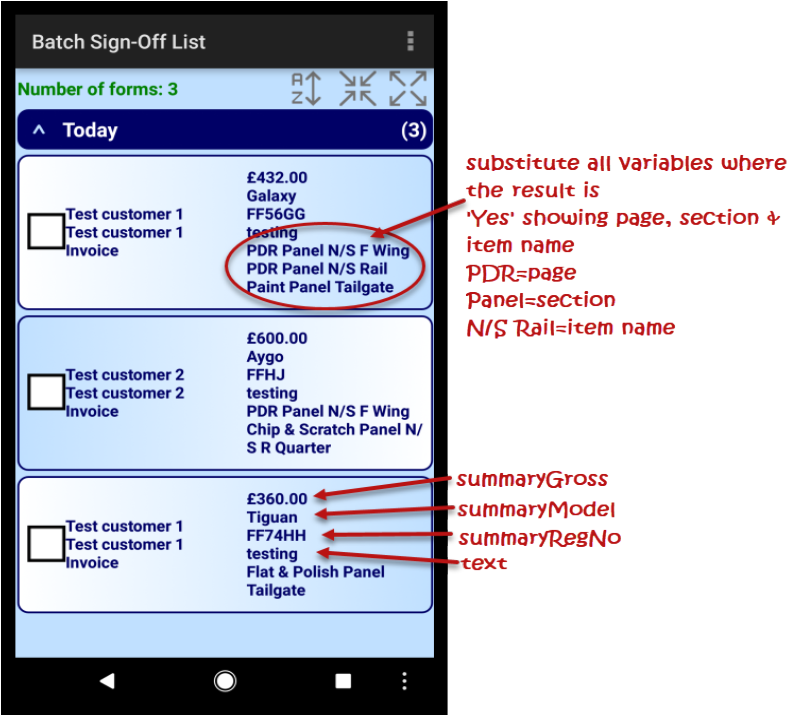
| Batch sign off list | contains a list of forms that can be selected for batch sign-off. Batch sign-off needs to be set up using the Batch sign-off tab in the template set up shown below | |
|
|
|
|
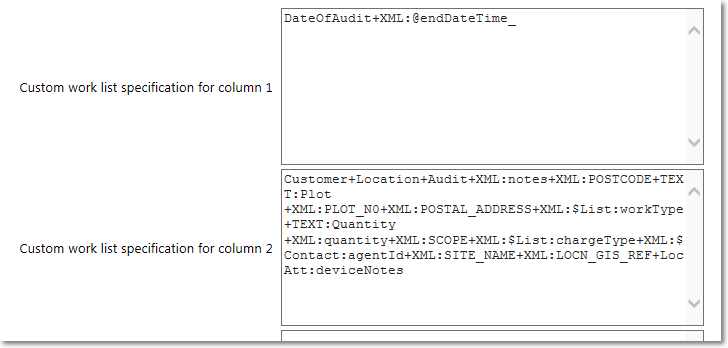
Simple display
| + | is used to divide up the fields. Do not use spaces or line feeds - any in the examples is simply where words have wrapped around in the text box |
|
These key words don’t need XML or anything other than the + sign between them
|
|
| DateOfAudit (date) | Date format referring to when the form was filled in |
| Customer | The name of the customer selected |
| Location | The name of the location selected |
| Audit (template) | The name of the template used to complete the form |
| @endDateTime_ | The date/time job is scheduled to be complete by |
|
outputs items from the job definition or partially completed form (template)
|
|
| XML:[unique name] |
shows what has been entered for the item with that unique name eg XML:quantity items selected from lists are stored as numeric ids so this will show the id rather than the text, and the same applies to other items (see below) |
| XML:$List:[unique name] for list items | shows the text of the list item selected on a form eg XML:$List:product |
| XML:$Contact:[unique name]for contacts | shows the name of the contact selected on a form eg XML:$Contact:SiteContact |
| XML:$User:[unique name] for list items which are users | shows the name of the user completing/partially completed the form eg XML:$User:AssistingEngineer |
| XML:$Phone:[unique name] for phone number items |
shows a phone number entered in a Phone Number template item type eg XML:$Phone:SitePhone |
| outputs attributes for either customer or location. The list of these attributes evolves over time but most of them can be viewed here. | |
|
LocAtt:[attribute name] CustAtt:[attribute name] |
shows a location attribute such as device or office notes, history or building description eg LocAtt:buildingDesc shows a customer attribute such as adhoc customer flag, contract list or address eg CustAtt:address |
| TEXT:[required text] | outputs some text as typed. This useful for qualifying whether it is the location address or the customer address eg TEXT:Delivery+CTL:BLANK+TEXT:address |
| formats the output | |
|
CTL:CRLF CTL:BLANK |
creates a new line inserts a space |
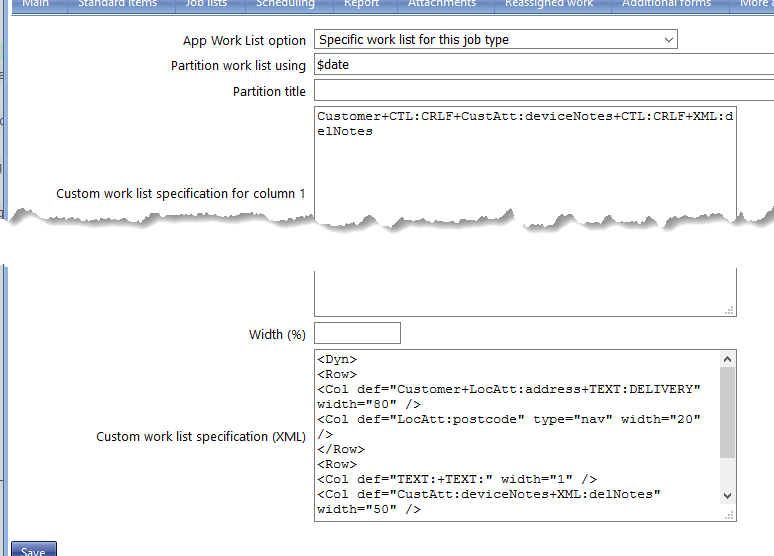
More complicated display - worklist (device) only
| Partition work list using |
$date to partition by date, $location and $customer are also available. other field options can be added to the apk by contacting magic5 support |
| Partition title | text to clarify the partition eg Date of delivery: or Deliver to: |
| Custom work list specification (XML) |
this is an ALTERNATIVE to the columns outlined above. As it is more technical, it is recommended that it is only used when adding a navigation aid or more than one row per worklist item. <Dyn> and <Row> are essential and the same each time. They must be 'closed' using </Dyn> and </Row> respectively. Each <Row> is a new row for the worklist item and there can be as many as required. Inside each <Row> columns are defined as above using <Col def="[the same as entered above]" width="[same as entered above]" /> In addition a type can be added. Currently these are map and nav which need def="LocAtt:postcode" and, respectively, open
|
Conditional display
|
SV |
substitute variables (you should be able to use this for any formula that would usually work on the device)
Format is basically SV:%formula% |
| @ |
always means "result" with @[unique name] for a particular item/section/page or @ on its own means "all items" eg SV:%@refNo:... would refer to something with the unique name of 'refNo' (it may be a page, section or item as unique names are unique across all 3) or SV:%@:... would make use of any items in the template |
| OPITEM | indicates that conditional items are going to be output using the syntax OPITEM:[conditionToMatchForEachItem]:[outputForMatchingItems] |
|
rVItem rVItemX |
conditionToMatchForEachItem uses the syntax rVItem;[conditionType];[result] or rVItemX;[conditionType];[result] where delimters are semi-colons ( ; ) indicates that the condition checks against the stored result which may be an id, or in some cases, such as tickbox (see example), Yes indicates that the condition checks against the text of the result which might be stored as an id, such as for a customer or a list item, in which case the description will be checked against. This is particularly useful for Yes/No/NA conditions |
| conditionType | uses the same conditions as testType within Display Conditions within the template (see list here). It will usually be equals. |
| result |
is what is tested against. In with an equals conditionType this is likely to be either text or an id for a list. For example rVItem;equals;10903 where 10903 is the id for a product with a description of '1 metre hose' or rVItemX;equals;1 metre hose for the same product. |
| outputForMatchingItems | |
|
{0} {1} {2} {3} |
indicates what is to be output if the condition is met. They are separated by a [space]. page name section name item name item result For example SV:%@:rVItem;equals;10903:{0} {1} {2} will might output Service Washing Machine On order, corresponding to Page, Section and Question respectively. |
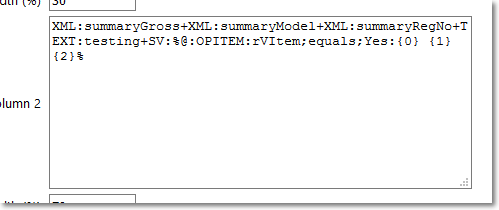
Here is an example of a combined simple and conditional display in the second column of a Batch Sign-off List.